How to Add Ecommerce to an Umbraco Website

There are several options when it comes to ecommerce for Umbraco, from plugins through to enterprise level solutions (and their hefty yearly price tags).
Some are easy to set up, whilst others require a degree in software engineering to implement :) .
The following steps explain how to add ecommerce to an Umbraco website:
- Add javascript and css links to your Website Default Master page.
- Create simple basket and checkout pages in Umbraco back-office.
- Add ecommerce checkout widgets to your Umbraco HTML pages.
- Insert Add to Basket buttons on your Product pages.
- Configure ecommerce in the Umbraco Back-office.
- Start selling!
Add Links to Javascript and CSS to Your Website Template
To help with this article, we are going to use an ecommerce plugin called Cartbraco, but other platforms work in similar ways.
Step 1 involves adding two simple links to your site's main template, often called the Layout or Master Template. The image below shows a typical example.
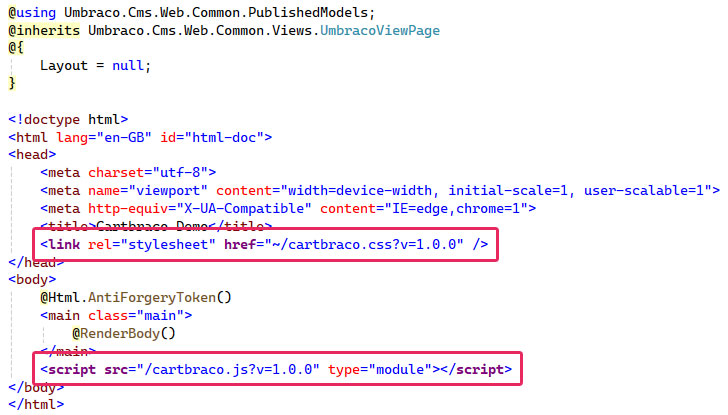
Add this line of code just before the </head> tag in your template (for css styling):
<link rel="stylesheet" href="~/cartbraco.css?v=1.0.0" />
Add this line of code just before the </body> tag in your template (adds the javascript for front-end behavior and logic):
<script src="/cartbraco.js?v=1.0.0" type="module"></script>
Add Simple Basket and Checkout Pages
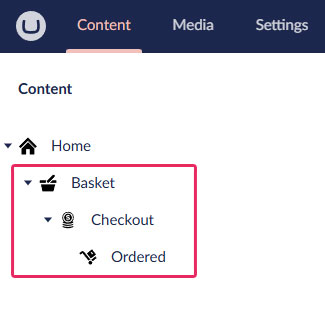
Step 2 to adding ecommerce to your website involves the addition of simple basket, checkout and order placed pages within the Umbraco back-office.
The best approach is to use a series of nested pages that guide users through placing an order. A typical basket and checkout URL structure looks like this:
/basket
/basket/checkout
/basket/checkout/ordered
Cartbraco doesn't enforce this structure, you are in full control, but we find this approach generally works the best.
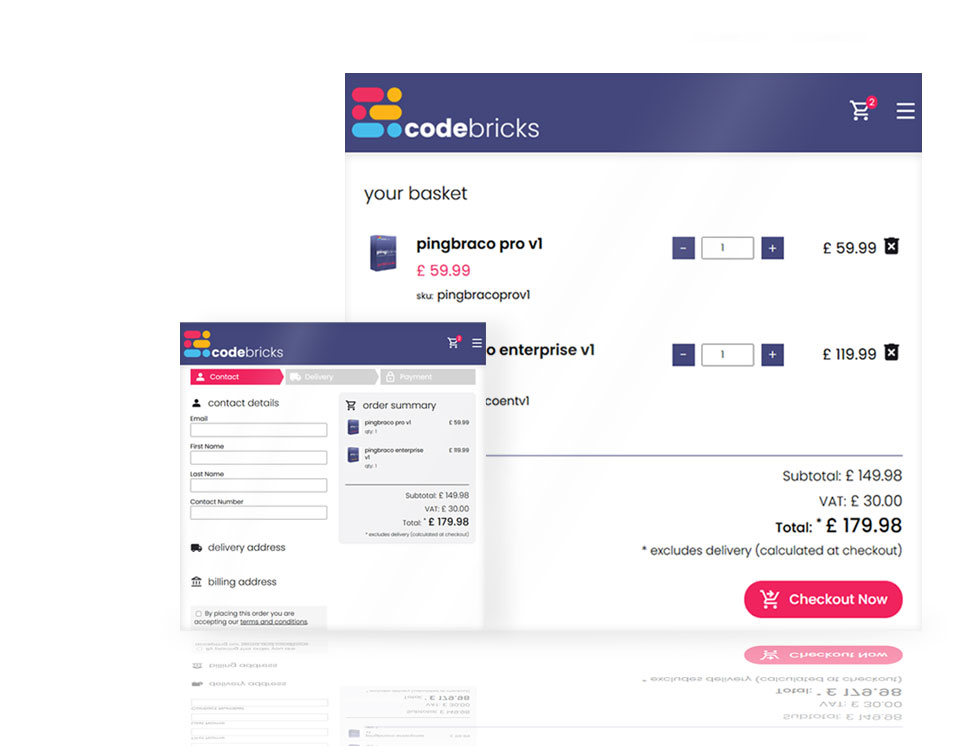
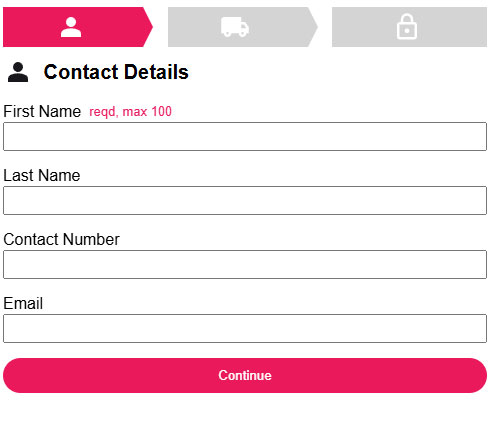
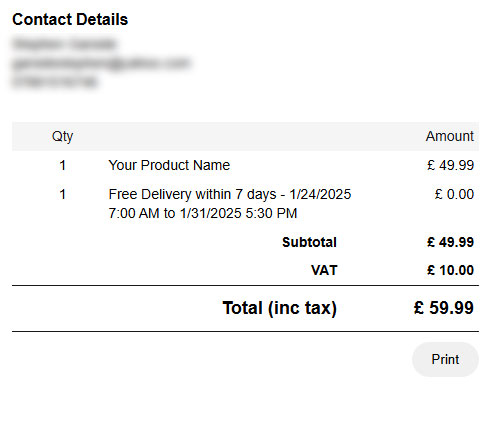
Add Checkout Widgets to Your Umbraco HTML Pages
Step 3: If you are using Cartbraco, add widgets to your three new pages to instantly create a basket and checkout experience in your Umbraco store. Simply insert the following lines of code into the relevant page's HTML template:
/basket
Include code:
@await Component.InvokeAsync("CartbracoBasketListVC")
/basket/checkout
Include code (Progress Bar):
@await Component.InvokeAsync("CartbracoCheckoutProgressVC")
Checkout:
@await Component.InvokeAsync("CartbracoCheckoutVC")
Basket Summary:
@await Component.InvokeAsync("CartbracoBasketListSummaryVC")
/basket/checkout/ordered
Include code:
@await Component.InvokeAsync("CartbracoOrderPlacedVC")
Product Page Add to Basket Buttons for Umbraco Ecommerce
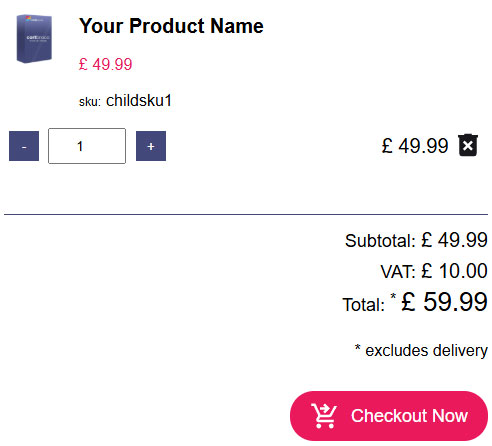
Step 4 - include Add to Basket buttons within your product pages.
With an e-commerce plugin like Cartbraco, you can use two widget styles: Single or Multi Add to Basket. The clue here is in the widget name, the Single option adds a simple button that when clicked will add your choice of sku to the visitors basket. The Multi option adds a component to the page allowing users to select the relevant sku, adjust quantities and the all important Add to Basket button.
With Cartbraco, each button style can accept a range of parameters the dictate the quantity added to basket together with other, optional theme related settings.
Single Add to Basket Button
Required: sku
Optional: quantity to add, text, fore and background colours and an icon url
Include code:
@await Component.InvokeAsync("CartbracoSimpleAddToBasketBtnVC", new { sku = "yoursku1", qty = 1.0, text = "Add to Basket", fg = "#ffffff", bg = "#f0235e" })

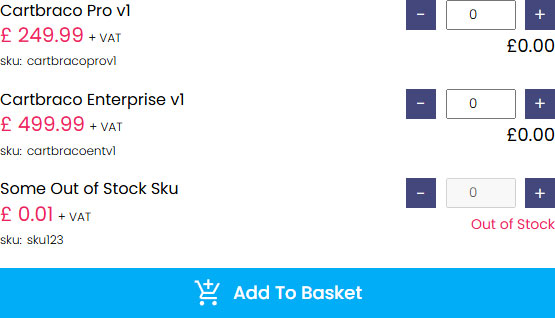
Multi Add to Basket Buttons
Required: skus, comma separated
Optional: text, fore and background colours and an icon url
Include code:
@await Component.InvokeAsync("CartbracoMultiAddToBasketBtnsVC", new { skus = new[] { "yourparentsku" }, text = "test", fg = "#ffffff", bg = "#f0235e" })
Configure Ecommerce in the Umbraco Back Office
The final step when including any ecommerce plugin to your Umbraco website is to configure settings such as style, webhooks, tax, currency etc.
In this example we are using the Cartbraco Umbraco 13 store plugin, so log into the back-office and head to the Cartbraco section, followed by the Config tab:

The tab's contents are split into 9 sub-groups:
- Core Urls - Your website domain, basket, checkout and Ordered page urls.
- Order Tracking - A url template for an order tracking link on order confirmations.
- Webhooks - Optional url endpoints to send basket data on order placement and amends (useful for 3rd party system integrations).
- Default Shipping Restrictions - Set global Zip or Country restrictions for your goods and services.
- Tax, Rounding and Currency - Default settings such as rounding, decimal places, tax factors etc.
- CSS, HTML - Customisable HTML elements for order confirmations, terms etc, and the option to apply your own custom CSS styling.
- Payment Gateway - Select your Payment Gateway of choice (Cartbraco ships with 2 Stripe payment gateway options - Embeded or Hosted).
- Company Information - Set your companies Invoice Address, methods of contact etc for inclusion on Order confirmations.
- Order Confirmation - Choose if and when to send an Order confirmation email to your customer, and at what status i.e. Placed, Shipped, Delivered.
Cartbraco allows you to adjust your Umbraco ecommerce store's theme, including field labels, button colours, icons, your business logo etc. Click on the Theme tab to reveal the theming options available to you.
N.B. These are deliberately kept to a minimum with the intention of the widgets inheriting your own site's style.
Free Umbraco Ecommerce Demo?
With your Umbraco website now a fully fledged online store, the only thing left to to is get selling!
In this article we used the Codebricks Cartbraco Ecommerce plugin to explain how to convert an Umbraco website to an online store.
If you want to chat more about Cartbraco or request a demo then please get in touch.
Free trials available on request and prices start at just £249.99+vat (one off fee).